The Process of Screen Printing from Start to Finish
April 18, 2024 3:06 pm Leave your thoughts
Screen printing, also known as silk screening, is a technique used to transfer ink onto a substrate, such as fabric or paper, through a mesh screen. This versatile method can be used to create intricate designs, logos, and patterns on a variety of surfaces, making it a popular choice for printing t-shirts, posters, and other promotional items. In this blog post, we will explore the process of screen printing from start to finish, including the steps involved in creating a high-quality printed product.
What is the Process of Screen Printing?
The process of screen printing involves several steps that are essential to creating a successful print. These steps include designing the artwork, preparing the screen, printing the design onto the substrate, and curing the ink to ensure durability. Each step plays a crucial role in the overall quality of the final product, so it is important to pay attention to detail and follow the process carefully.
Step 1: Designing the Artwork
The first step in the screen printing process is creating the artwork that will be printed onto the substrate. This can be done digitally using graphic design software, or by hand using traditional methods such as drawing or painting. The key to a successful print is a high-quality design that is clear, detailed, and visually appealing. Once the artwork is complete, it is transferred onto a transparent film positive, which will be used to create the stencil for the screen.
Step 2: Preparing the Screen
The next step in the screen printing process is preparing the screen. This involves coating the mesh screen with a light-sensitive emulsion and exposing it to UV light using the film positive as a stencil. The areas of the screen that are exposed to light will harden, while the areas blocked by the artwork will remain soft. After exposure, the screen is washed with water to reveal the stencil, which will allow ink to pass through and onto the substrate.
Step 3: Printing the Design
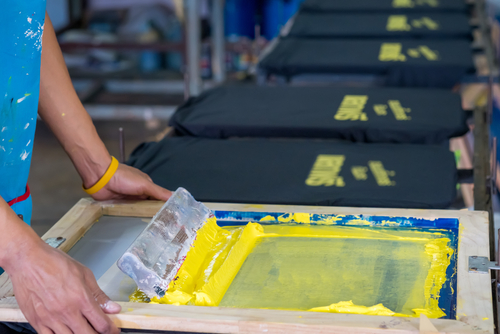
With the screen prepared, it is time to print the design onto the substrate. The screen is placed on top of the substrate, such as a t-shirt or poster, and a small amount of ink is applied to the top of the screen. A squeegee is then used to spread the ink evenly across the screen, forcing it through the stencil and onto the substrate below. This process is repeated for each color in the design, with a separate screen and stencil required for each color.
Step 4: Curing the Ink
The final step in the screen printing process is curing the ink to ensure durability and longevity. This is typically done by heat-setting the ink using a heat press or conveyor dryer. The ink must reach a specific temperature and be held for a certain amount of time to bond with the substrate and create a permanent bond. Once the ink is cured, the printed product is ready for use and will be able to withstand regular wear and tear without fading or peeling.
Summary
The process of screen printing involves several steps that are essential to creating a high-quality printed product. By following the steps outlined above, you can create professional-looking prints that are durable, vibrant, and visually appealing. Whether you are printing t-shirts, posters, or other promotional items, screen printing is a versatile technique that can help you bring your creative vision to life. So next time you need to create custom prints, consider the process of screen printing and the stunning results it can achieve.
Need Custom T-Shirt Printing in Hanover, PA?
Categorised in: Screen Printing
This post was written by admin

